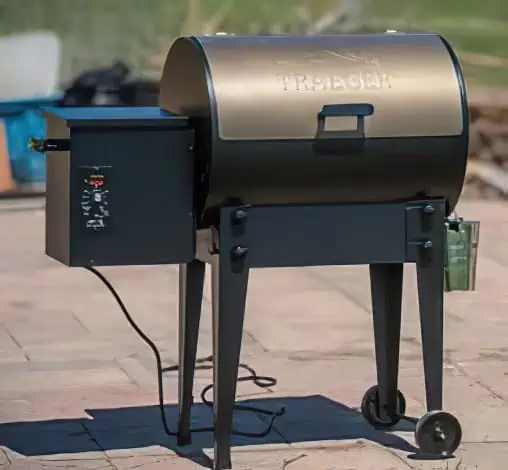
The act of grilling may be very seductive. Since it’s summer, you’ve definitely fired up your Traeger grill to prepare barbecued salmon, chicken legs, or a mouthwatering Tomahawk steak.
However, you need to clean your grill now that you’ve finished cooking your scrumptious barbecue. The key to Trager grill maintenance is understanding how to clean a Traeger grill. Fortunately, after today, you won’t have to struggle to maintain a clean grill. You will be able to maintain your Traeger barbecue expertly. All you have to do is to follow all the steps and reminders below. Now let’s start cleaning!
Steps on How to Clean a Traeger Grill
STEP 1. Clean the grill’s outer surfaces
Make sure to clean it with a gentle cloth or several thick paper towels. The grill’s exterior doesn’t need to be rinsed.
Note: Make sure the Traeger grill has completely chilled before cleaning it. Do not ever clean a hot grill.
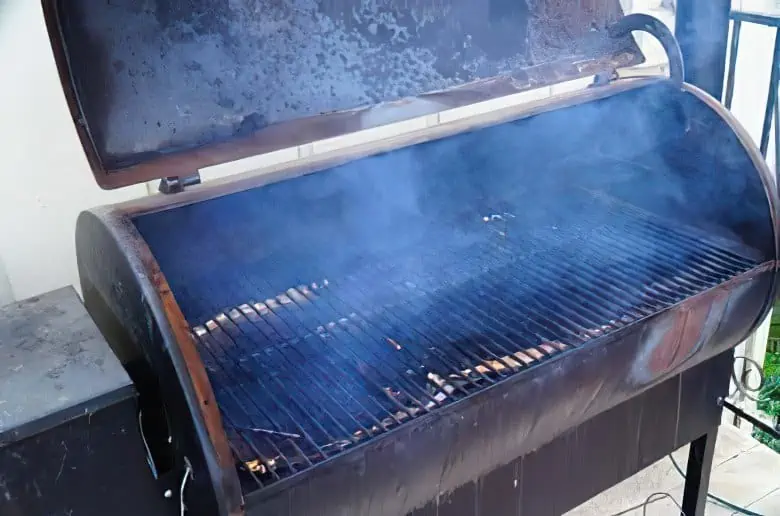
STEP 2. Clean your grill grates next
Wash your grill grates in warm, soapy water if they are really dusty and heavily caked with food. However, it’s advisable to use a sponge in addition to a nylon scrubber or grill brush if your grill grates are made of porcelain. Cast-iron grill grates can be scrubbed using only a scrubber, nylon brush, or wooden scraper. Grill grates made of cast iron are seasoned to making them non-stick. Scrubbers and brushes with abrasive bristles might damage the non-stick finish.
One of the main elements that might affect the health of your barbecue is grease buildup. The drain pan’s purpose is to hold oil. But just because grease builds up in the grease pan doesn’t mean it won’t harm the grill’s other components.
Note: The porcelain coating could be harmed by using an abrasive scrubber or brush, including one made of metal.
STEP 3. Remove the grill lid from the firebox next
The firebox has ash in it. Ash should not be spilled as it will go everywhere. Put the ash in a plastic bag or disposable rubbish.
Cleanse the internal lid of the grill with a gentle cloth. To get rid of any leftovers, wipe the side panels. Spray the Traeger grill cleanser on the particles if it is difficult to remove. To really get the muck off the panels, wipe them once again with the cloth.
Vacuum the area around the grill’s base using the nozzle. Any wood ash or chunks of burnt fat that collect at the grill’s base will be sucked up by the vacuum cleaner.
Note: With a gentle cloth, clean the thermostat probe. You can get an erroneous reading from the thermostat if debris covers the probe.
STEP 4. Empty the oiled pan
Ensure that the grease is thrown in a container that can be quickly dumped, such as a plastic bag, trash bag, or plastic cup. The grease should not be tossed into the sink. Your pipes will be harmed by the grease. Make sure the grease is cool as well so it can be readily disposed of. After disposing of the grease, wash the drain pan in hot, soapy water. The leftover grease will be eliminated by the hot, soapy water.
Note: Hot grease may melt plastic containers if you pour it into them, making a huge mess.
STEP 5. Wrap your grease pan with aluminum foil
Although the foil is not perfect, it will make future drain pan cleaning simpler. As an alternative, you can line your grease pan with grease bucket liners.
You need to replace your seals if there are leaks or gaps surrounding them. The amount of smoke and airflow from your grill can be significantly impacted by damaged seals. Fortunately, grill seals are inexpensive and simple to repair.
Note: It is best to inspect your Traeger grill’s control panels, cables, and seals when cleaning it. From there, you can get in touch with a specialist who can replace rusty or stained electrical equipment.
STEP 6. Reassemble your Traeger grill
The Traeger grill should now be put back together. Firebox and the grease box should be added. Your grill is now ready for use with the addition of the cooking grates.
Using a grill cover is the best method to keep your barbecue from becoming damaged. If your Traeger grill is missing a cover, it is not difficult to locate one in physical stores or online.
Note: Put a grill cover on your Trager grill if you aren’t going to use it straight away.

Traeger Grease Drip Pan Cleaning Tips and Guidelines
Besides knowing how to clean Traeger grill, you should also know how to clean the grease drip pan. You should be able to clean the grease drip pan in addition to the Traeger grill. To prevent the taste of fat in your food, the drip pan, a crucial component of the grill, must be kept clean. Not only is cleaning your oil drip pan good for you, but it will also make the parts of your barbecue last longer. Keep in mind that leaving food particles in your container for an extended amount of time can harm your burners and other important components. So follow the steps below on to clean your grease drip pan.
1. Switch Off the Grill
Before removing the drip tray from your grill, turn off all of the heat sources.
2. Take Away The Drip Tray
After removing the drip tray (and setting it away), clean the area around it with a cloth or towel that has been dipped in warm water. Till all residue has been eliminated, repeat steps 1-3 several times.
3. Towel Off Or Wipe Dry With A Cloth
After thoroughly cleaning the area where the drip tray once was with a moist cloth or towel, allow it to dry fully. You can put it back into your grill for another usage once it has dried completely.
Commonly Question Ask When Cleaning A Traeger Grill
How often should you clean your traeger grill?
It all depends on how frequently you use your grill, which is a pretty great question. Do you frequently grill? Are you a weekend griller or do you grill every day?
In our home, the grill is used occasionally every day and typically 2-4 times per week. For pizza, we most certainly use it! On your Traeger, have you ever grilled a take-and-bake pizza? If you haven’t, you MUST do this! I leave off. To get back to what we were talking about, I would advise replacing the aluminum foil roughly every three weeks in order to prevent grease fires on your drip tray.
As part of your Traeger grill maintenance, We advise vacuuming out the barrel and the hotpot about once per month or month and a half.
Can a grease fire occur on your traeger grill?
Although it’s unlikely, this is absolutely feasible. It’s crucial to replace the aluminum foil on your drip tray on a regular basis to prevent a grease fire from starting if there is an excessive buildup of grease on the drip pan.
Since we hadn’t replaced the aluminum foil on the drip tray, we had a grease fire in our grill, which is entirely our fault. Therefore, if the aluminum foil appears to be able to be replaced, do it right away to completely avoid this. Let’s face it, if you’re anything like me at that time, you’re ready to eat and have no interest in spending a few extra seconds clearing the grill of food residue.
How to clean your traeger’s exterior?
There are a few different ways to clean your grills outside. You may make a simple degreaser with warm water, a few drops of dawn dish detergent, and vinegar, combine these ingredients in a spray bottle, and use this solution to clean the grill if it needs a little deep cleaning, which is an important component of Traeger grill maintenance.
To clean the grill, we make use of the enormous pack of white towels. Once the filth and grime have been removed, thoroughly rinse your grill to remove all of the soap The grill gets a wonderful shine from it that lasts for a while. So make sure you read the manufacturer’s directions before you begin cleaning your grill. A Traeger barbecue is such a smart purchase. It will endure for MANY years if properly cleaned and maintained.
How do you clean your Traeger grill grates when the grill is hot?
The difference between using a wooden grill scraper and stainless steel bristles is that there are two different types of barbecue grates: porcelain and stainless steel.
Personally, I don’t care for nylon cleaning pads since they melt when placed on hot grill grates. To be honest, they weren’t made to withstand such high temperatures.
In contrast to cleaning the Traeger grill right away after the food is removed, many people, like myself, prefer to use the scrapers once the grill has warmed up when they are getting ready to utilize their grill.
Why is Traeger grill cleaning important?
It’s crucial to comprehend why cleaning a Traeger grill is even necessary before we get into the mechanics of how to do it. There are various reasons why cleaning Traeger grills is essential.
First, the buildup of soot and oil reduces the cooking efficiency of your grill, requiring more pellets to provide the same amount of heat. Over time, this may result in higher costs and the burning of extra pellets (and having to replace them).
Second, it’s crucial since these grills will begin to develop rust spots on their bodies with time, especially after a few years. Without removing all of the paint or purchasing a totally new grill body, these are typically irreparable. In order to keep your grill operating at its best, it’s also crucial to clean the interior after each usage.
Last but not least, it’s critical since regular maintenance will assist your grill last longer without the need for new parts (which can be costly).
Conclusion
Summer evenings are perfect for grilling on your Traeger grill barbecue. It’s better to start with a clean grill, though. By doing this, food won’t stick to your grill. Your Traeger barbecue can be cleaned quickly and easily. With the appropriate equipment, cleaning your barbecue will be a breeze. Don’t forget to wait till your grill is completely cool before cleaning it. Summer evenings are perfect for grilling on your Traeger grill barbecue. It’s better to start with a clean grill, though. By doing this, food won’t stick to your grill. Your Traeger barbecue can be cleaned quickly and easily. With the appropriate equipment, cleaning your barbecue will be a breeze. Don’t forget to wait till your grill is completely cool before cleaning it.
Hi, I’m Adam and I’m a HUGE fan of Food and Cooking.
Do you enjoy grilling sessions with your family while staring at the beautiful fire pit flames?
Flame Gorilla is the site to learn how to have that perfect backyard experience.