Want to learn how to build a fire pit patio with pavers? In this article we’ll show you how it’s done.
Have you ever looked out unto your backyard and realize that something is missing? Have you ever walked out of your back door and then wonder how it would feel to step out onto a patio built beautifully with pavers and at the center of it is a fire pit, roaring with warm, welcoming fire?
Fire pits and a good, clean, stylish paver patio is quite popular for homeowners who have the space and the enthusiasm of spending a lot of time outdoors. Setting up a bonfire in the backyard and inviting over friends and loved ones is truly a party that everyone looks forward to attending. There is something fulfilling and relaxing when you can sit back, relax and enjoy comfortable evenings by the fire without having to worry about being smack in the middle of a campsite.
Patio with pavers are usually done by professionals but sometimes, it can cost quite a lot. You might be one of those people with limited budget who feel a like they will not be able to have that kind of set up in their own homes. However, there is hope and with a little determination, you can actually set up your own DIY patio with pavers with a great fire pit to boot!
The DIY project you are about to be privy to can be done in just a couple of days. Patience and a bit of hard work will be expected but, the end result is truly worth it. Of course, you will still have to shell out a little bit of cash to buy the materials but compared to a professionally done fire pit and patio, this do-it-yourself project will generally cost you around $350 for the paver patio and an additional $50 to $150 for the added fire pit.
Just keep in mind that there are different ways to actually have a paver patio with fire pit built. This article will offer you an explanation and a simple step by step process on how to build your own simple but sturdy, efficient paver patio and fire pit.
So, before you get started, you have to gather all your materials and make sure that you organize them as well as store them properly. Do not choose or buy the tools and materials you need in different times and intervals since this is a sure fire way to waste money and time. It is imperative that if you have a DIY project, everything that you need and your build requires is on hand and stocked before you actually begin the project.
Check Landman Group, Inc. for Landscaping and Design Service in San Antonio, TX and Grout Man for Grout and Tile Cleaning and Maintenance in Austin and RoundRock, TX.
What You Will Need for Building a DIY Paver Patio with Fire Pit
Materials:
- Pavers
- Paver base
- Paver sand
- Wall block stones
- Bricks or Stones (optional)
Tools:
- Tape Measure
- Wheel barrow
- Shovel
- Rake
- Level
- Hand tamper
- Marking Spray paint
- 1 pc of 2 x 4
Double check your list to make sure you do not miss anything. Also, if you can afford a few extra pieces of materials, in case there is an emergency or you need to redo something, then please stock up on those as well. You can never be too complacent when building something like this. You always want to be able to work efficiently while saving money.
How to Build a Fire Pit Patio with Pavers
Building Your Paver Patio
It is important that you start with building your patio first before the fire pit. After all, the groundwork, design and spacing from your fire pit to its surrounding area is determined by how large or small the expanse of your patio will be.
This part of the process can be done by a single person however, it can be a little bit of a laborious job. It is better to have at least one helper to provide you some assistance and to get the project done as soon as possible.
STEP 1: Determine Your Patio Space
You have to start building by marking or estimating where you want to situate or lay your paver patio. You can choose to have it directly placed off the back of your home or you can place it along the side of your house. It really depends on your landscape aesthetic or which area offers the most space. It is ideal that your patio is easily accessible from your back or side doors.
Once you have determined its placement, figure out the size and dimensions of your patio. If you have the exact measurements, use your tape measure and start marking the work area with the spray paint.
STEP 2: Prepare the Area
After the markings have been placed, it is time to clean out the space by removing the grass and weeds that are inside the marked area. You have to dig deep, about four inches for your paver base and an inch for your paver sand plus the depth of your pavers. This is the general rule of thumb. So, if you are using a 3 inch paver, you will have to dig about 8 inches of ground.
You can use a shovel and dig the ground area by hand or if you have the power tool, then use a rented (or if you own one) gas-powered turf cutter. This will help you speed up the work but, it is not really a huge requirement unless you want to spend a little extra money to cut the labor time a little.
STEP 3: Lay and Level Your Base
By this time, you must have already finished digging out the entire area where you will build your patio. It is now time for you to put approximately 4 inches of paver base. Once you have laid it down, use the rake to even out the surface as much as possible. Then, tamp it down with a hand tamper.
If you are content with how even your paver base is, you may begin to add a layer of sand to make a level surface. Take the tamper and tamp it down again to make everything even and then get the 2 x 4 to scrim the surface. Get your leveling tool and use it to ensure that the base is equal or even. Tamp and scrim repeatedly if it is not until your base is flawlessly even or level.
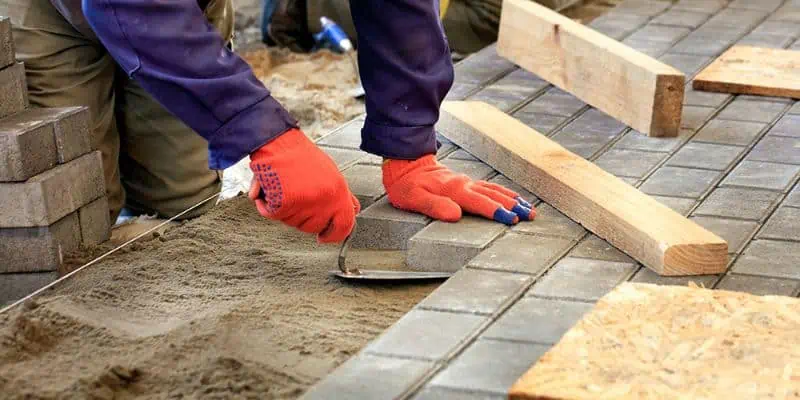
STEP 4: Get Those Pavers On
It is now time to start laying down your pavers. Make sure that you start on the outside edge, working from one side to another. Be meticulous and see to it that each paver is aligned properly with the previous one and do not forget to leave only a small space between each paver.
There are people who opt to have more decorative paver or a multi-colored one which does make things fun and eye catching. If you want to apply this to your patio, just make sure you determine what pattern you want to follow before you start placing the pavers down.
STEP 5: Put in the Sand
After you have completed step 4 and is greatly satisfied with your work, sprinkle paver sand over your handywork and sweep it into the cracks and spaces using a broom. If you see that each space is filled up with the sand, grab your garden hose and wet your pavers. This process will aid your pavers in settling into place while reducing the possibility of growing weeds in the future.
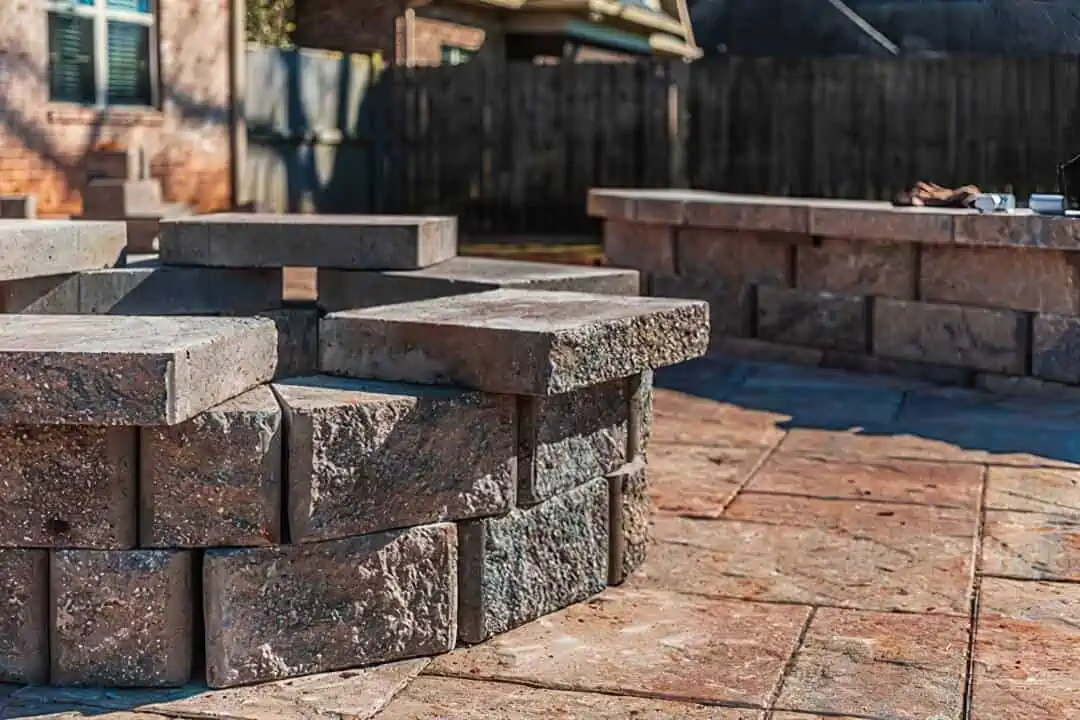
Building Your Fire Pit
Now that your paver patio is all settled and established, you can begin the simple process of adding your fire pit. First, determine where you want to place your fire pit. You can do it traditionally by putting it in the center of your patio or try something more artsy and place it off to the side. This part of the DIY process is totally dependent on your personal preference and aesthetic.
After you have decided where to place your fire pit, start laying down the first layer of wall block stones in the shape and size that you have in mind. Again, you can go traditional by making it circular with about 36 to 44 inches in diameter or go with any shape and size you have in mind.
Now that the first layer of stones are in place, make sure that the structure is level all the way around by using your level tool. If everything is even, begin adding the second layer of stones. Stagger them from the bottom layer so there are air holes in your fire pit since it is needed to get a fire going and keep it healthy. After the second layer is placed, check again to make sure it is level.
Add a third layer using the same process until you get the desired height of your fire pit. You can opt to place a layer of brick or stones and fill the bottom of your fire pit to make sure that your paver patio surface will not get burned.
Finally, you can add decorations, furniture and other fixings to make your new DIY paver patio into a comfortable haven for you and your family. Stock up on wood because you know you will be wanting to spend time and use that cozy, relaxing area frequently. Just remember to study your fire safety tips when dealing with the fire pit.
Enjoy!
Hi, I’m Adam and I’m a HUGE fan of Food and Cooking.
Do you enjoy grilling sessions with your family while staring at the beautiful fire pit flames?
Flame Gorilla is the site to learn how to have that perfect backyard experience.